BiColor Technique SGreen
This is the method I use to create some my BiColor images. It creates a synthetic Green channel. I have to say I got some of the ideas for this from Ken Crawford’s color mapping method and Steve Cannistra’s BiColor method.
First I register and align my Ha and OIII subs in CCD Stack or whatever software you use for this. I then take them to Photo Shop to combine then into a BiColor image.
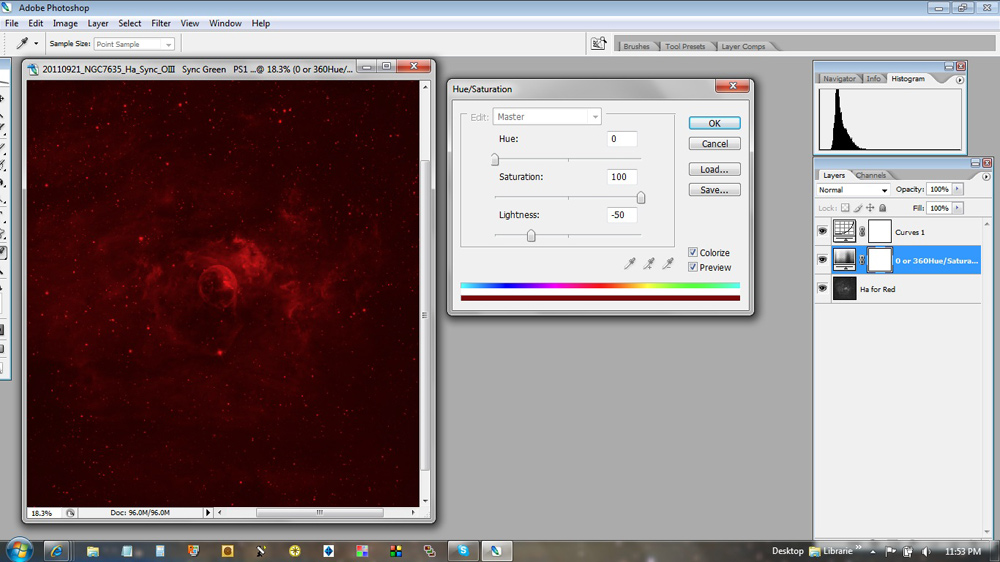
Now open your combined Ha sub and…. 1.Change it from grayscale to RGB Mode 2.Change the Blend mode to Screen 3.Open the Hue Saturation layer 4.Set Check box to Use Previous layer as clipping mask 5.Change to colorize and set the Hue to 0 or 360 6.Set theSaturation to 100 7.Set the Lightness to -50 8.You can add a curves layer for later adjustment
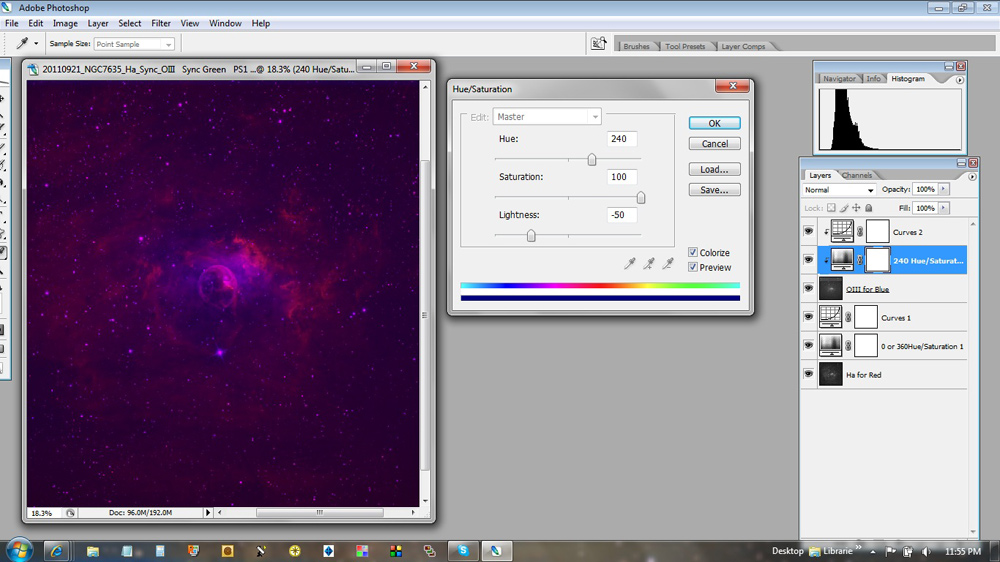
Now open your combined OIII sub and…. 1.Change it from grayscale to RGB Mode 2. Drag this image into the document 3.Change the Blend mode to Screen 4.Open the Hue Saturation layer 5.Set Check box to Use Previous layer as clipping mask 6.Change to colorize and set the Hue to 240 7.Set theSaturation to 100 8.Set the Lightness to -50 9.You can add a curves layer for later adjustment
Rename and Save you new document now.
Now for the Synthetic layer
Open your Ha and OIII subs again
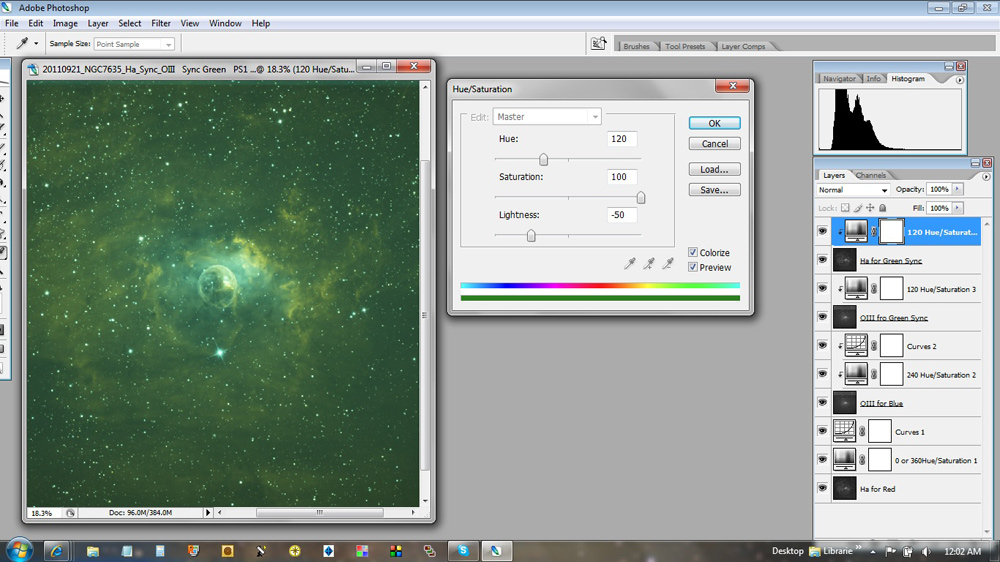
For the OIII data 1.Change it from grayscale to RGB Mode 2. Drag this image into the document 3.Change the Blend mode to Screen 4.Open the Hue Saturation layer 5.Set Check box to Use Previous layer as clipping mask 6.Change to colorize and set the Hue to 120 7.Set the Saturation to 100 8.Set the Lightness to -50 9.Also you can add a curves layer etc. for later adjustment
For the Ha data 1.Change it from grayscale to RGB Mode 2. Drag this image into the document 3.Change the Blend mode to Screen 4.Open the Hue Saturation layer 5.Set Check box to Use Previous layer as clipping mask 6.Change to colorize and set the Hue to 120 7.Set the Saturation to 100 8.Set the Lightness to -50 9.Also you can add a curves layer etc. for later adjustment
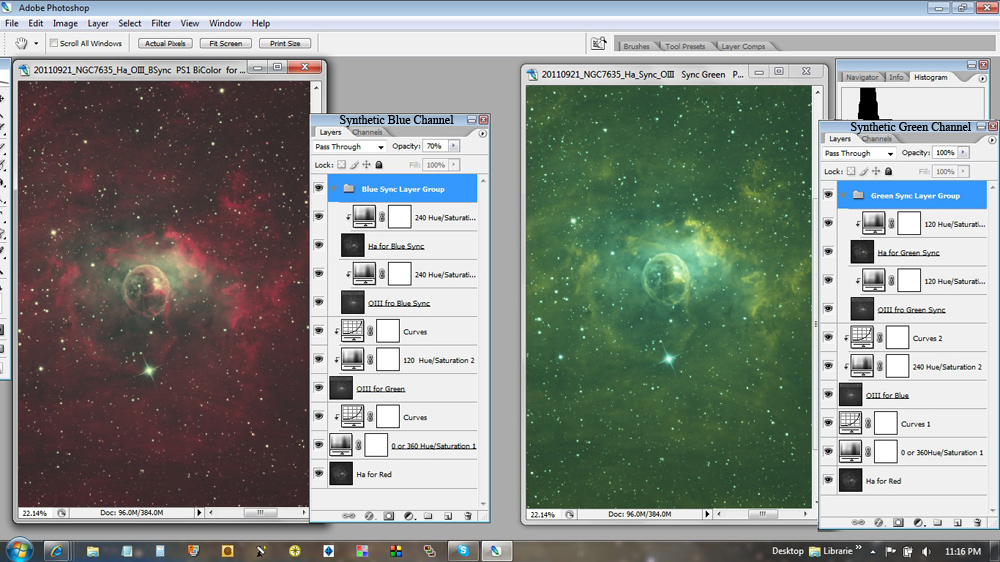
Now, create a Group and include these 2 data sets in this Group, named Sync Layer
Once both data sets are in the group, you can adjust either one. Adjusting the Ha or OIII synthetic layers individually using a curves, levels, saturation layer etc. , the changes are applied right before your eyes. You can also adjust the opacity of either the Ha or OIII, thus administering the percentage of Ha or OIII applied in the Synthetic layer. Now on top of everything else you can adjust the opacity of the entire group and control the amount of the Synthetic layer applied to the entire image.
Here is a screen shot of the same data combined with the Synthetic Blue technique and the Synthetic Green technique.


